Assembly Instruction
FAQ
ROKR - Magic Piano - AMK81
(Click the pictures to view in full size)
Assembling problems
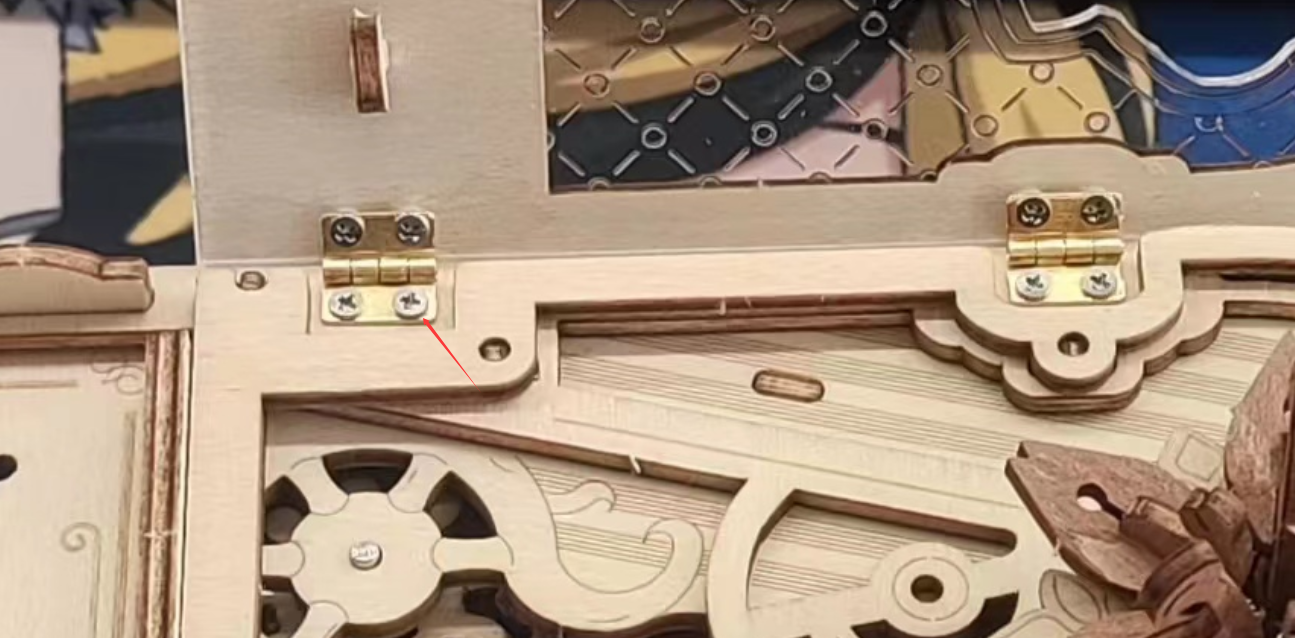
1.The piano lid cannot close fully: Slightly loosen the hinge screws assembled on the piano body.
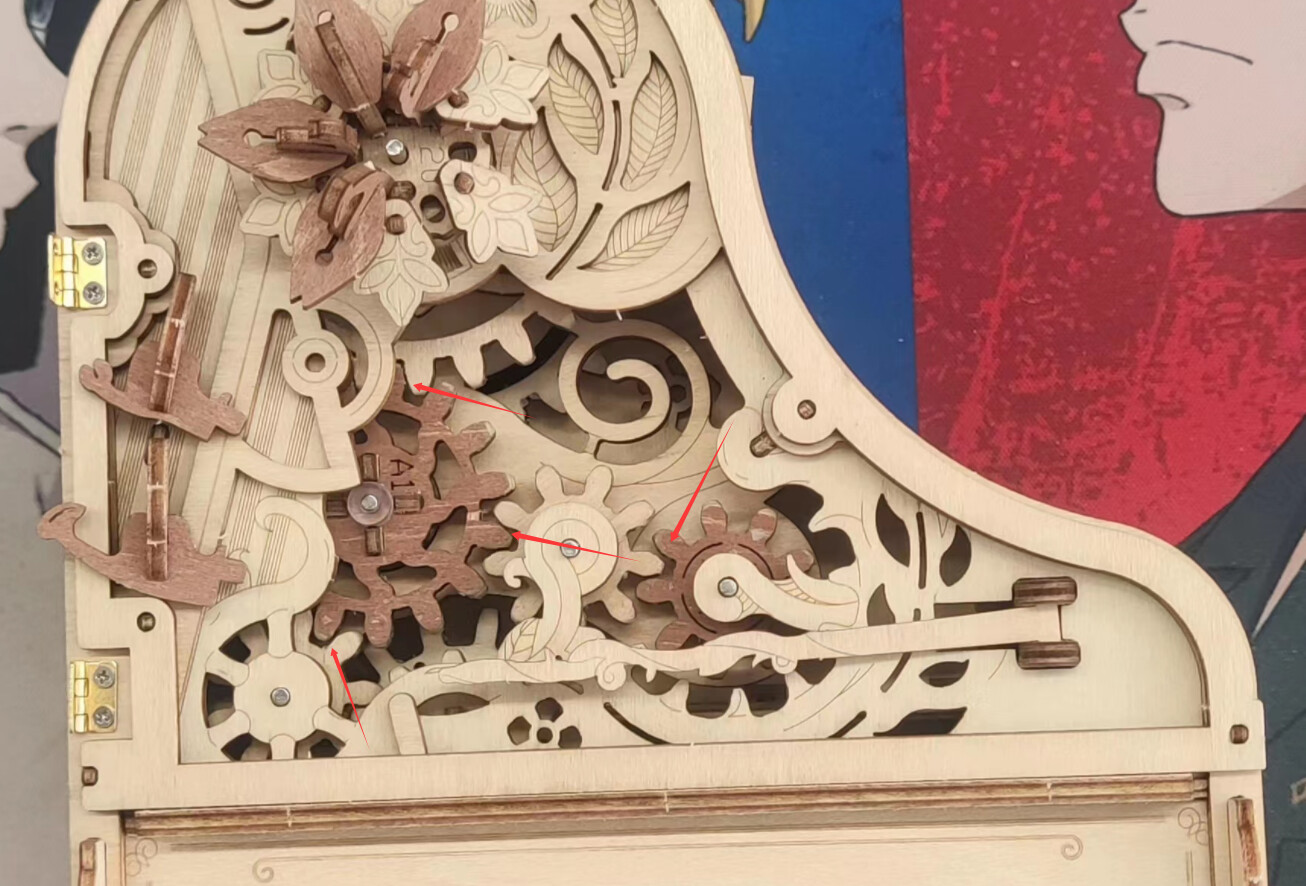
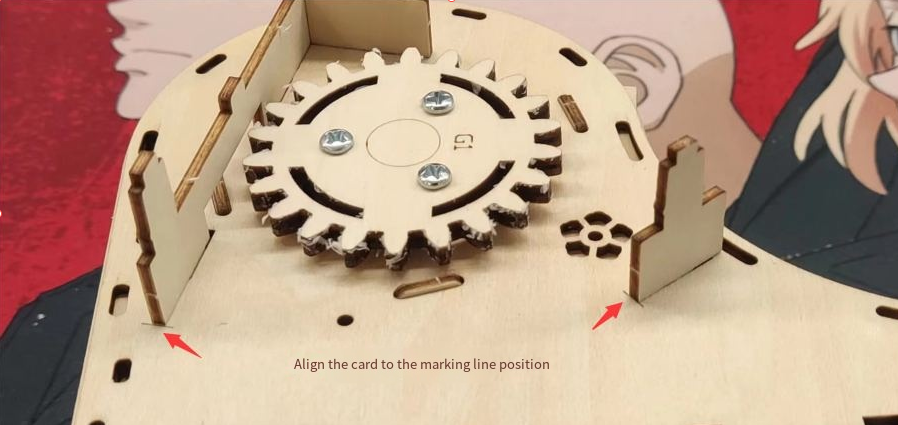
2.Part G4 is crooked after assembling:
①Check if the upper and lower part of Steel Shaft P10 are inserted onto D3 (Pictures 1 and 2).
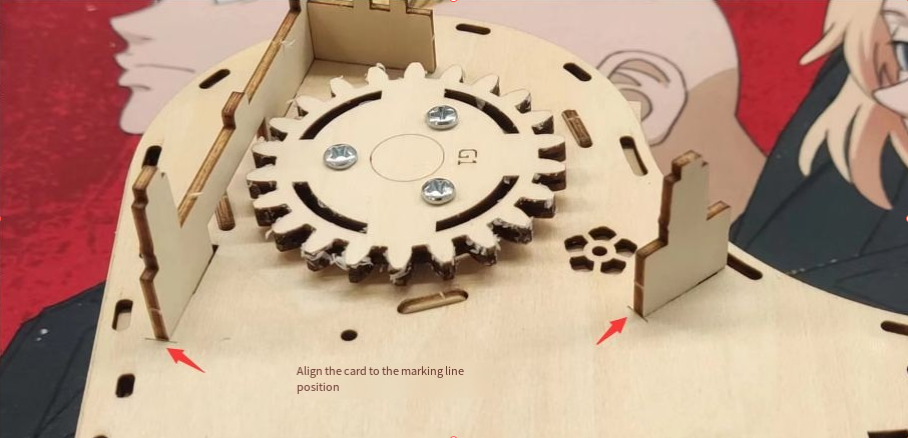
②Check if Part D2 is inserted to the marked line (Picture 3).
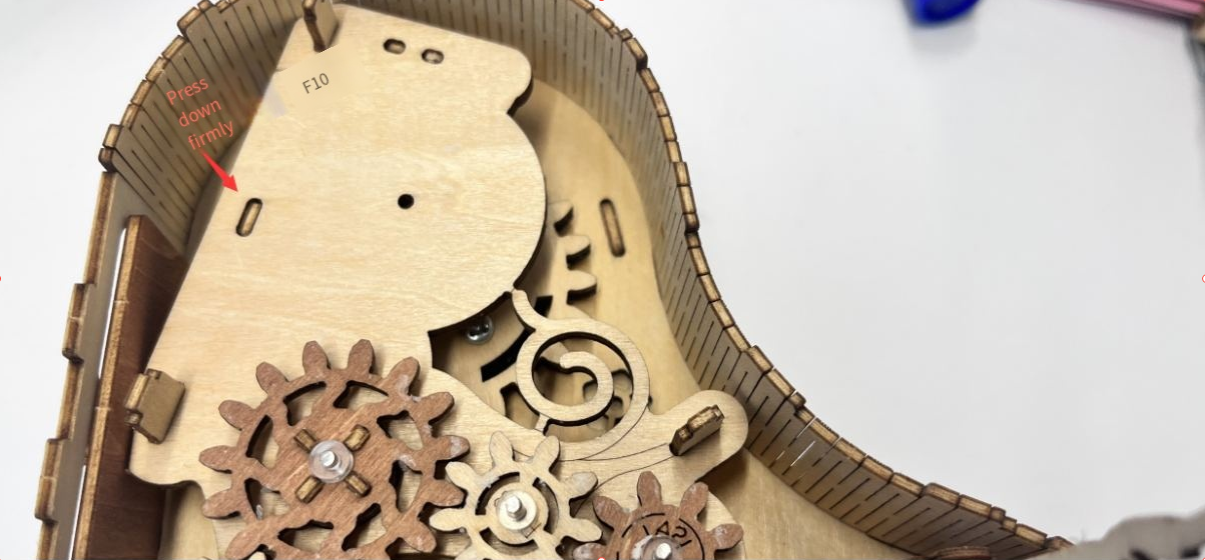
③Check if F10 is inserted in the proper place.
Picture 1:
Picture 2:

Picture 3:
Picture 4:
Gear Rotation Failure
1.Gears do not rotate or rotate with stagnation in Step 4’s first test:
①Check if Gears F19, G5, and A1 are waxed, and that the inner ring of F10 is waxed (Picture 1).
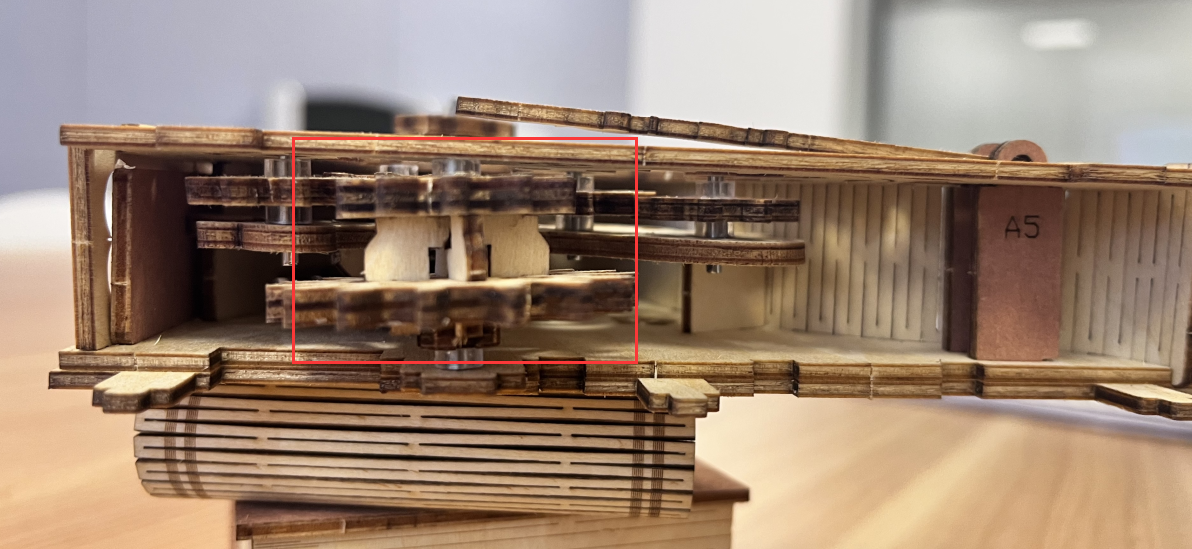
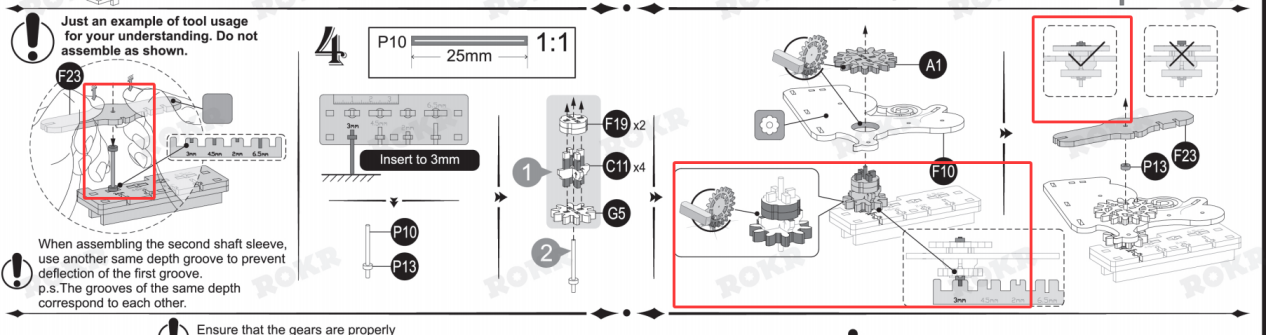
②Check if Gears G1 and G5 are engaged, and they should be flush when viewed from the side (Picture 2). If not flush, manually adjust them.
③If the heights of Gears G1 and G5 are completely inconsistent and cannot engage flush, check if the Steel Shaft P10 (25mm) is misused, and whether P13 and P10 are assembled in 3mm holes (Picture 3).
Picture 1:
Picture 2:
Picture 3:
- Gears do not rotate or rotate with stagnation in Step 4’s second test:
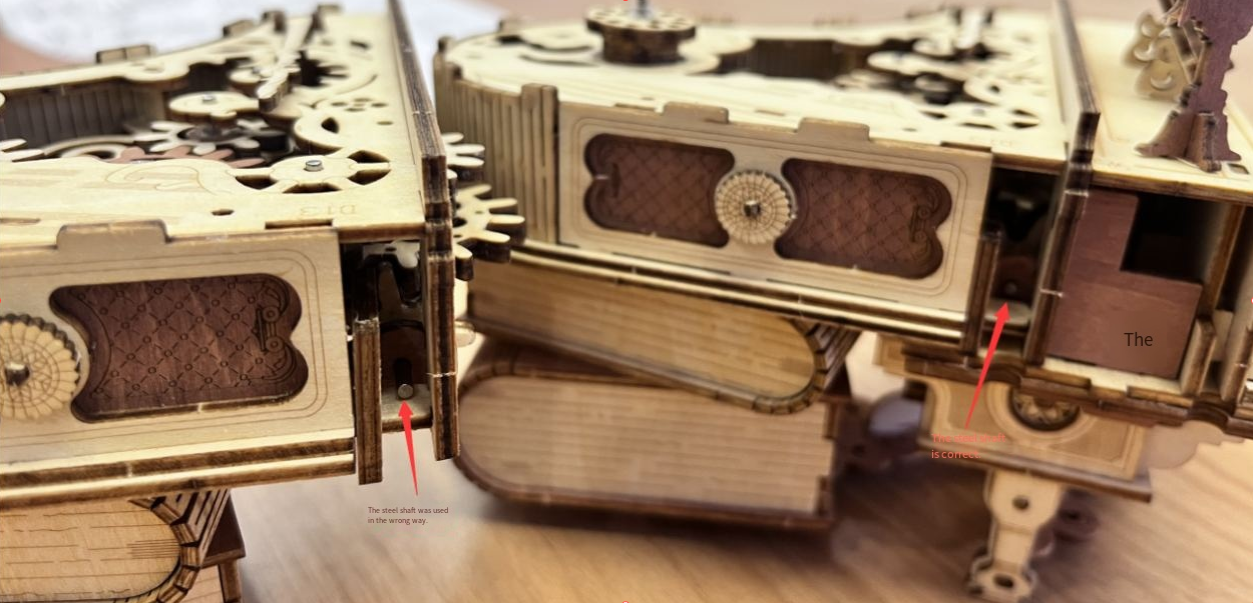
①Check if P8 and three P10 are in the corresponding holes (Picture 1). If not, remove the Part D13 to adjust and insert the steel shaft in the proper place.
②If the exposed steel shaft is too short to insert D13 in the proper place, check if P10 (25mm) is misused, and whether the corresponding steel shafts and bushings are assembled in the corresponding holes.
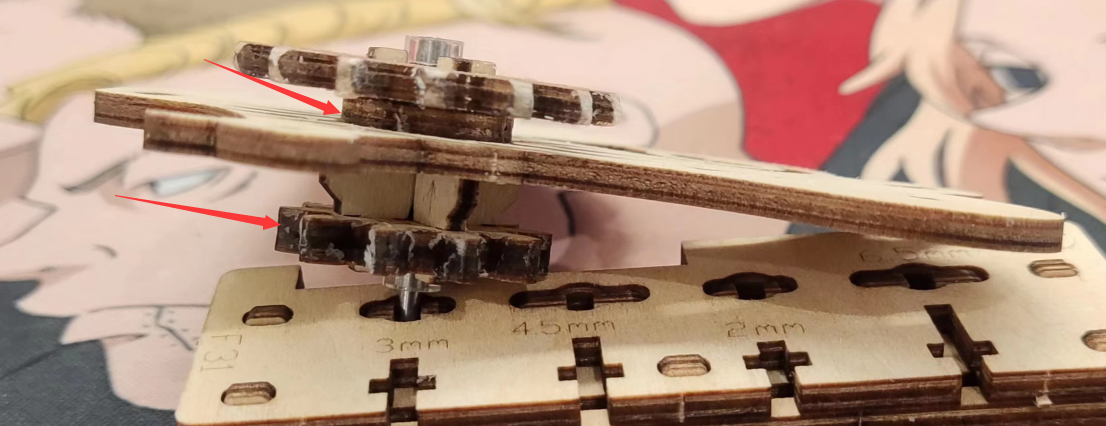
③It is recommended to remove Part F21 to F20 to check first if D2 is inserted to the marked line(Picture 2), then check if F10 is fully pressed(Picture 3).
Picture 1:
Picture 2:
Picture 3:
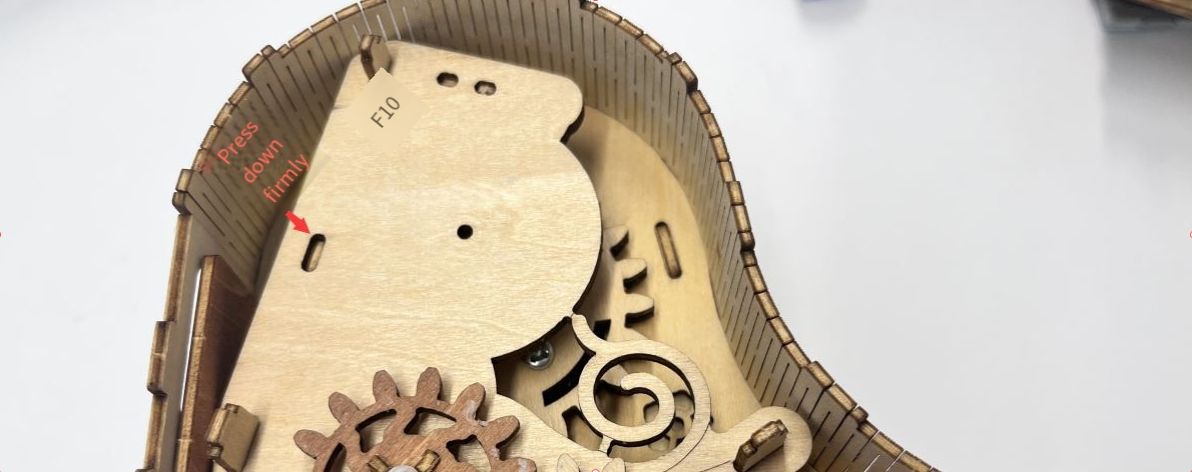
Picture 4: Press fully.
- Gears do not rotate or rotate with stagnation in Step 10’s first test:Remove Part F1, and rotate F20 manually. If the rotation is successful, tighten the movement to check.
①Check if the Part P9(20mm) is misused in Step 9(Picture 1);
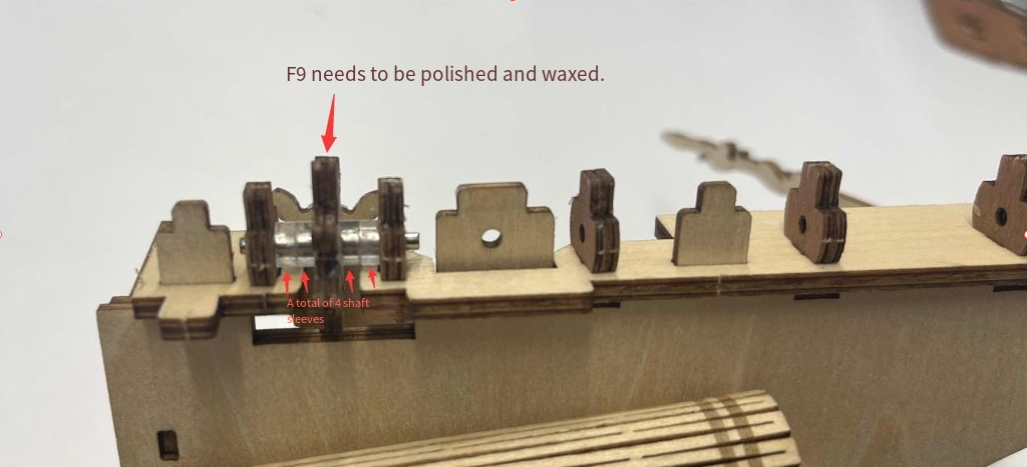
②Check if Part F9 is polished with sandpaper and waxed.
③Check if the number of Part P13’s bushings is correct. (Two bushings are on both sides of Part F9.)
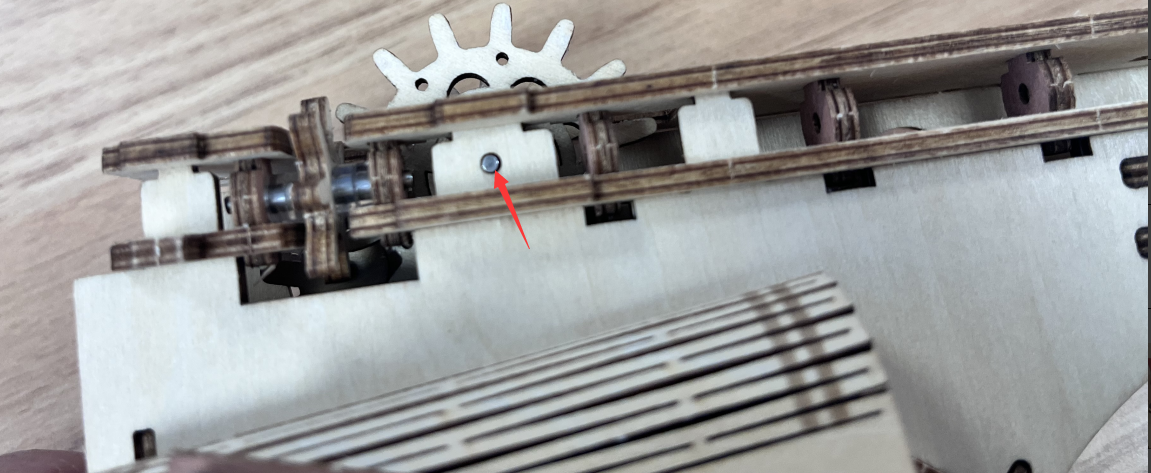
④If the gear rotates smoothly before the assembly of Part F1 but not after, it is recommended to polish the part at the F1 hole, and loosen the Part F1 and not to press Part F1 fully.(Picture 3)
Picture 1:
Picture 2:
Picture 3: Loosen the parts at these holes.
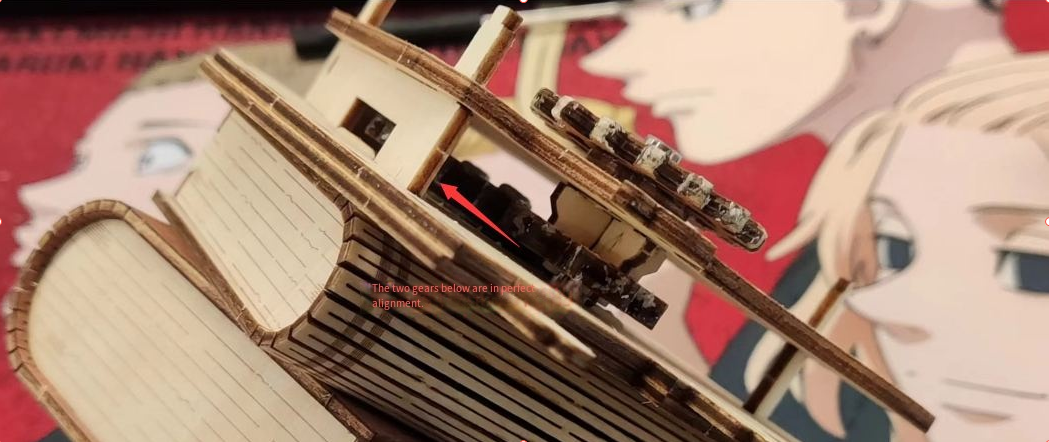
- Gears do not rotate or rotate with stagnation in Step 10’s second test and Step 12’s test:
①Rotate the petals clockwise slightly several times to make the gear rotate smoothly.
②If the gear cannot rotate smoothly after rotating the petals, dismantle the two parts to rotate the petals again, and check the gear’s rotation.
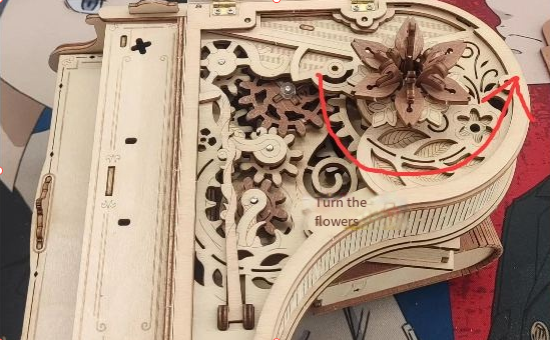
Dismantle two parts to rotate the petals:
- Gears do not rotate caused by stuck piano keys.
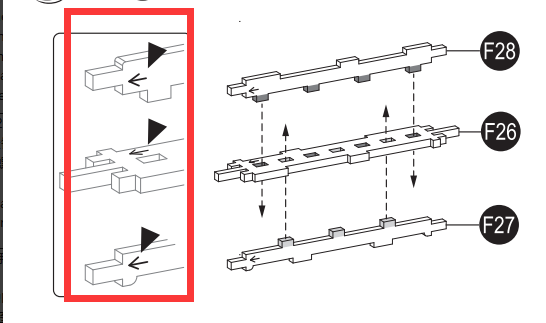
①Check if the arrow directions of Part F26, F27, and F28 in Step 5 are consistent (Picture 1).
Picture 1:
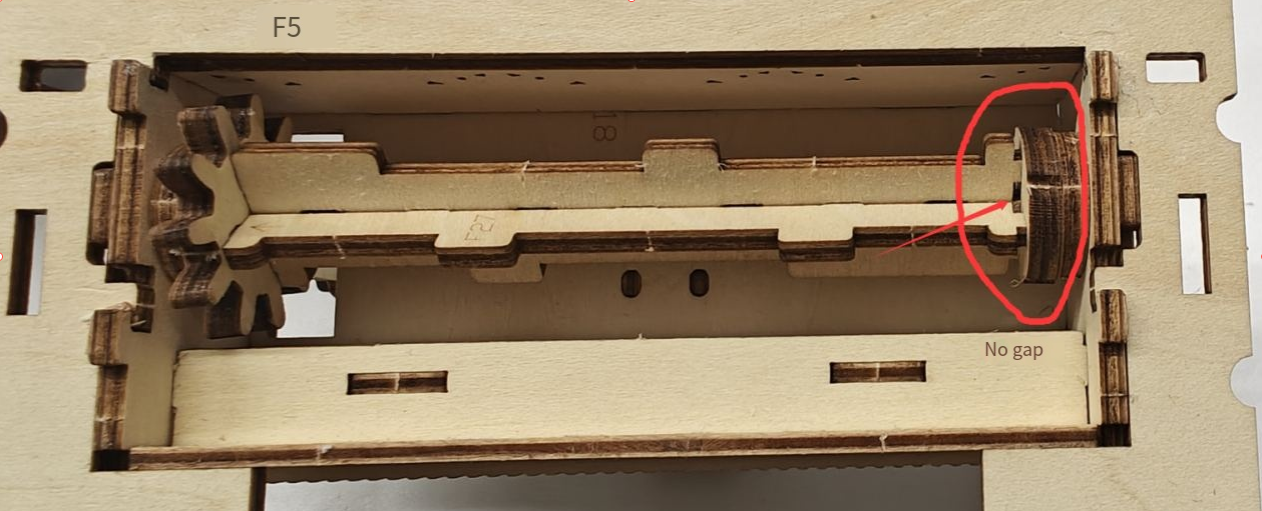
②Check if the right end of the long steel shaft in Step 8 is flush. If not, make it flush (Picture 2).
Picture 2:
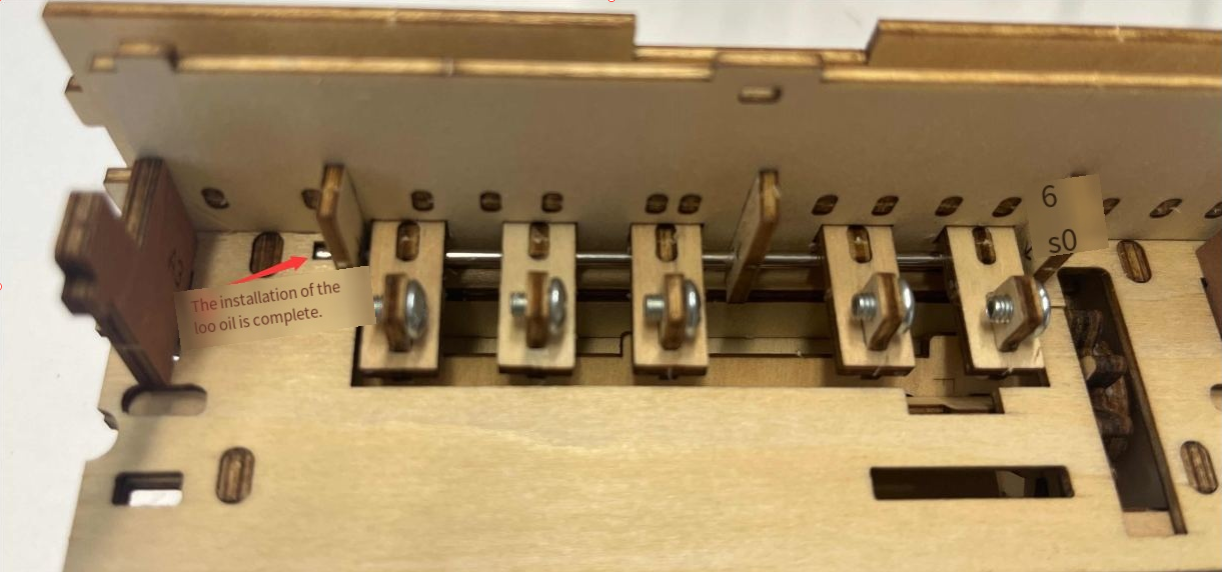
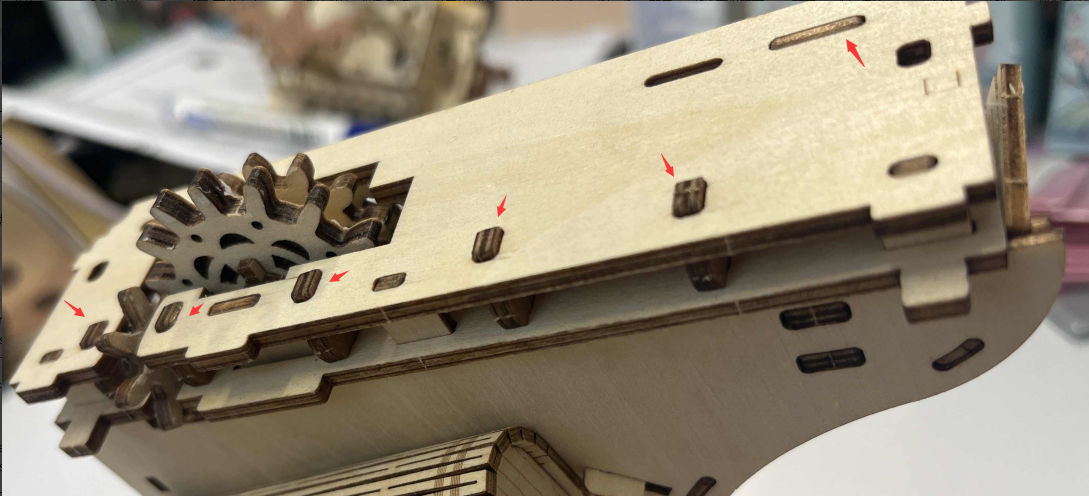
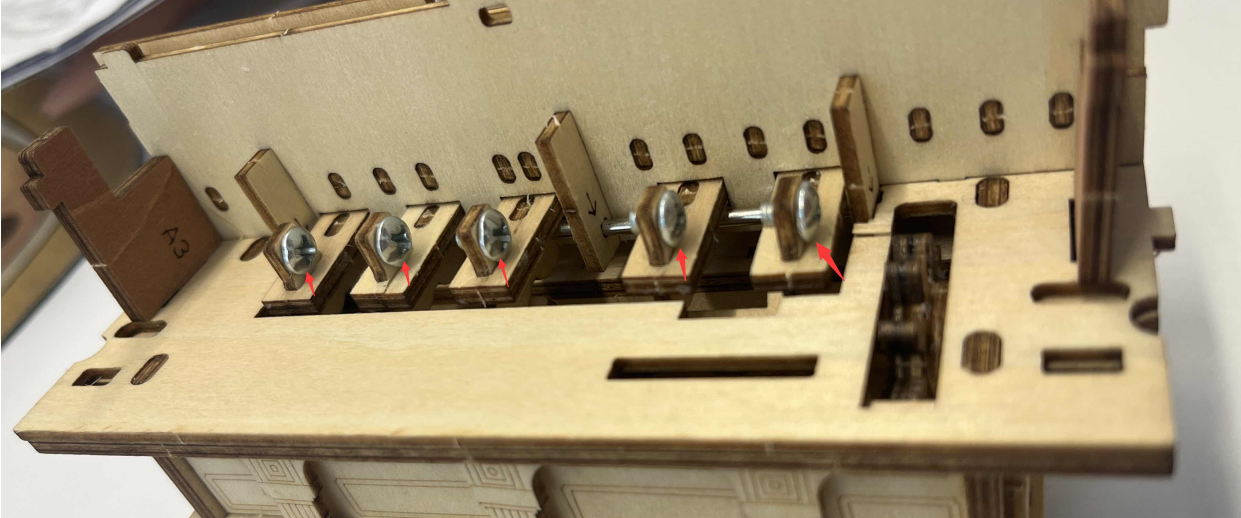
③Check if the assembly directions of the five P7 screws are consistent (Picture 3).
Picture 3:
- The gear starts rotating only after the music plays one or two sounds after tightening the movement.
①Explanation: Due to the many gears, there is a certain buffer time for the movement to drive the gears, the delay time is normal.
②Obvious stagnation when rotating by hand: Part G7, F3, and G3 are not inserted fully.